• Blog
  • LDS
    • Canada
    • Japan
    • U.K.
    • U.S.
    • World
    • Politicians
  • Site
    • About
    • Archive
    • Best of Rickety
    • Comments Policy
    • Copyright
    • FAQ
    • Feedback
    • Guests
    • Privacy Policy
    • Technical
    • Why Blog?
  • Sundry
    • Comics
    • HyperCheese Help
    • JFHE
    • Projects
      • Book of Mormon
    • Wishful Thinking

Rickety

Mostly about Utah

  • Family
    • Jill
    • Rick
    • Children
      • Daniel
      • Jake
      • Paul
      • Sarah
      • Steven
    • Children’s Spouses
      • Adelaide
      • Derek
      • Megan
      • Rachel
      • Shelese
    • Grandchildren
      • Aurora
      • Benjamin
      • Bryson
      • Caleb
      • Calvin
      • Cassandra
      • Elizabeth
      • Ezra
      • Helen
      • Jameson
      • Ryan
      • Sadie
  • Finance
    • Bank Rewards Checking
    • Credit Union Rewards Checking
    • Debt
    • Employment
    • Money
    • Rewards Checking Posts
  • Government
    • City
    • Elections
    • Federal
    • Military
    • Paul on Politics
    • Politics
    • States
    • Taxes
  • Recreation
    • Competition
    • Food
    • Fun in Utah
    • Games
    • Music
    • Parade
    • Sports
    • Travel
  • Religion
    • Christmas
    • Family History
    • Jesus Christ
    • LDS
    • Marriage
    • Missionary
    • On Religion
    • Preparedness
    • Scriptures
    • Temple
  • Series
    • 100 Years Ago
    • Christmas Letter
    • Epic Excerpts
    • On Religion
    • Past Pictures
    • Daniel’s Mission
    • Jake’s Mission
    • Paul’s Mission
  • Technology
    • Applications
    • Blogging
    • Communication
    • Computer
    • Energy
    • Environment
    • How To
    • Photography
    • Population
    • Transportation

Simple Water Heater Emergency Heat

November 10, 2011 by paul w 5 Comments

This year’s Halloween nor’easter has started me thinking about how to heat my apartment if the power goes out for an extended period of time.

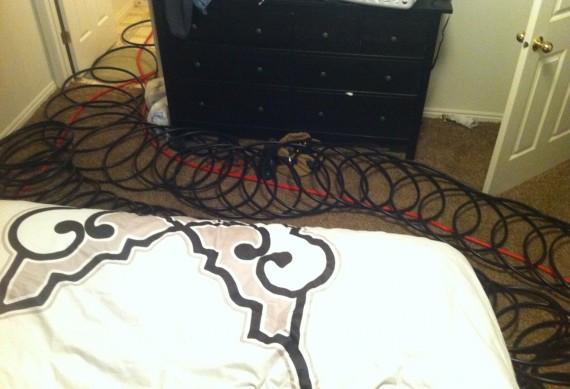
If the water and gas are still on, one possibility is to make a simple hydronic heating system using the water heater. The basic idea is to hook a hose to the hot water faucet, run it around a room, then to a drain.

As a proof of concept I picked up a faucet to garden hose adapter and some extra hose from Home Depot. After setting up the system I turned off the furnace and went to sleep.

Table of Results

Time Room °F Flow Rate GPM °F in °F out BTUs Notes
10:00 pm 70.1 0.5 150 100 12,500 Max. flow water heater can sustain
10:23 pm 76.8 0.2 150 100 5,000 Reduced flow
10:27 pm 77.4 0.2 150 95 5,500
10:57 pm 79.3 0.2 150 95 5,500 Too hot, opened window and door
11:19 pm 77.5 0.1 150 90 3,000 Reduced flow, closed window and door
04:30 am 75.9 0.1 145 85 3,000

 
The system worked extremely well. I suspect it could easily heat two rooms.

Setup Details

Procure a dual thread for 3/4 inch hose or male 55/64 inch adapter, model number 37.0109.98, $5.95. Alternatively the hose could be attached directly to the washing machine faucet.

Attach adapter to hot water faucet

Attach adapter to hot water faucet. Connect hose to adapter


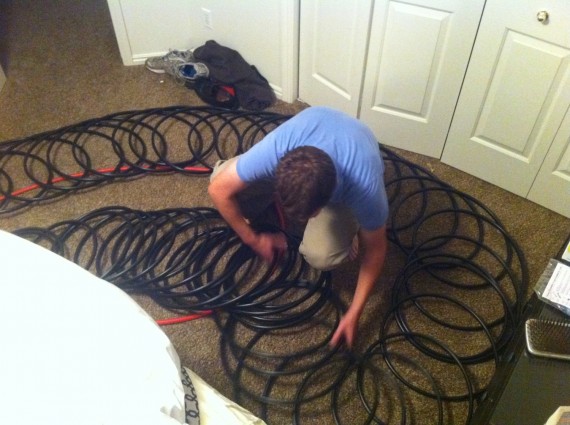
Spread hose around the room

Spread hose around the room


Ensure there are no kinks

Ensure there are no kinks


Drain waste water into tub

Drain waste water into tub


 Questions?

Filed Under: How To, Paul, Preparedness

Replacing My Sacrificial Anode

March 19, 2011 by rickety 20 Comments

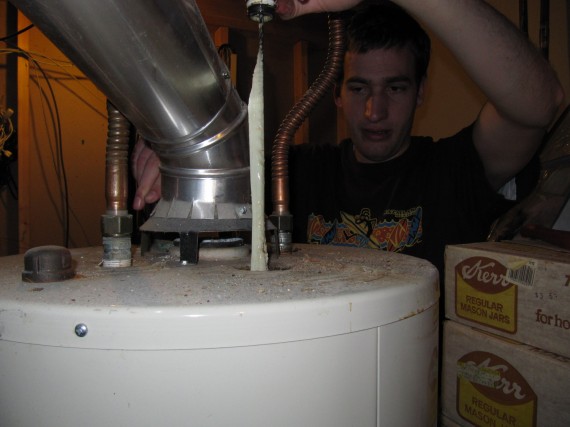
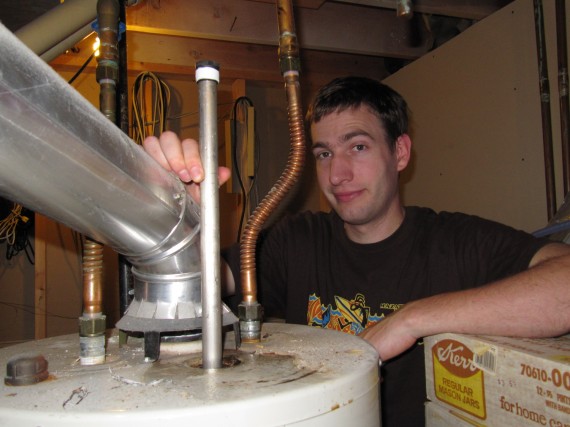
Extracting the spent anode

Extracting the spent anode

It is time, yet again, to replace my water heater’s sacrificial anode. My purpose here is to bring to your awareness the importance of changing the anode to substantially prolong the life of your water heater. This is not a “how to” and if you are unsure of your skills you should call a professional.

Rust Protection

For decades, the sacrificial anode has been a key part of the rust protection of a tank. The anode is a rod made of magnesium or aluminum that’s formed around a steel core wire and is screwed into the top of the tank. When the tank is filled with water, an electrolytic process begins whereby the sacrificial anode is consumed to protect a small amount of the tank’s exposed steel. Anodes corrode more quickly in softened water.

When the anode is removed, if you can see six inches of the steel core wire, replace the rod. If all you have is the steel core wire, or less, then the tank may be about to fail, or it could last several more years. There are two kinds of anodes, combo and hex-head. The hex-head has its own port that you can see in my photographs, the combo is found in the hot water port.

I always replace my anodes with magnesium rather than aluminum. Aluminum produces less driving current between anode and cathode (the tank is the cathode). It produces many times its original volume in corrosion byproduct which adds to sediment and can also clog filters. Aluminum rods expand as they corrode making them hard to remove. And lastly some of that aluminum can get into the cold water and do nasty things to your liver, brain, and kidneys.

For more information, see The Basics: Anodes and Longevity. These are the people I buy my anodes from if I cannot obtain them locally.

Preparation

I read about sacrificial anodes just before my first water heater rusted through and had to be replaced. I removed the anode from the old tank and found all that was left of the rod was the steel core. By changing the sacrificial anode at least every five years, the new tank has now outlasted the old tank.

To make replacing the anode a little easier, when I bought my new tank I made sure it came with an hex-head anode. Before obtaining a replacement anode, I measured the distance from the top of the tank to the ceiling. That will be the maximum length of anode you can install. In my case I had 48 inches of clearance — just right.

Removal

Paul replaced the old anode with Megan photographing the steps.

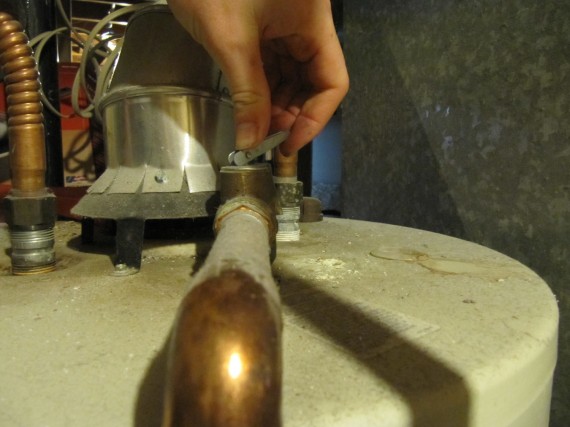
Opening the temperature relief valve

Opening the temperature relief valve

Paul turned off the water to the house and then opened the temperature relief valve on the tank. He didn’t turn off the natural gas supply to the water heater, although in the past I have done so when I have changed the anode.

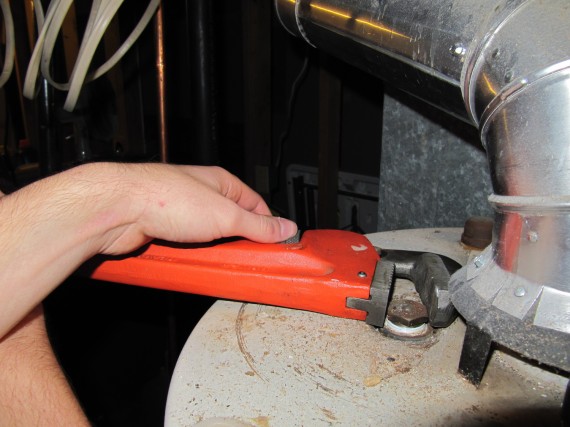
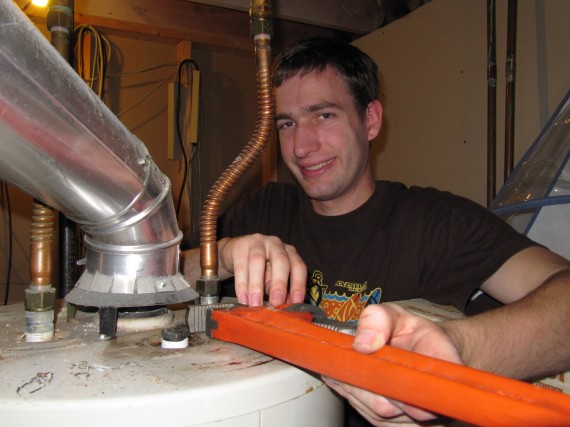
Using a wrench to remove the anode

Using a wrench to remove the anode

A large adjustable wrench was used to loosen the hex-head anode. It came out easily though sometimes they really do need a hefty wrench.

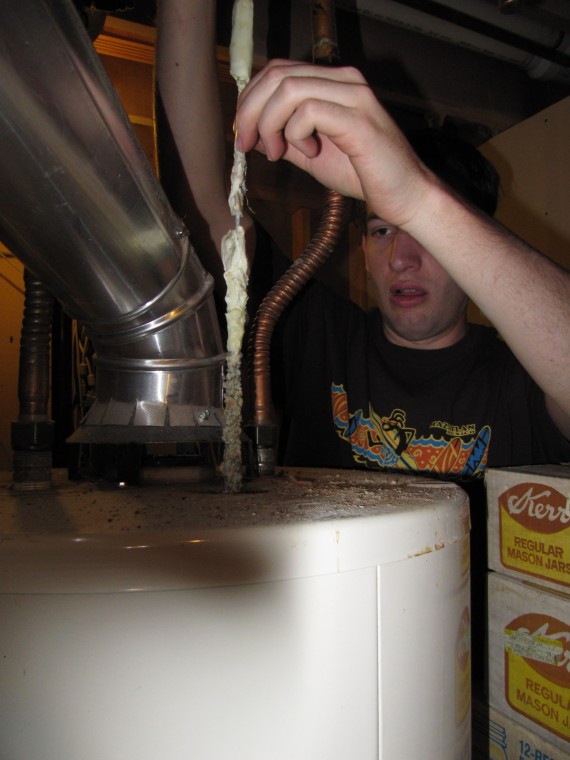
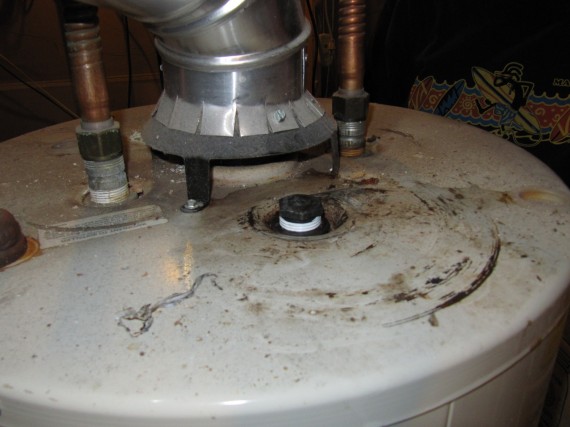
Removing the anode

Removing the anode

The old anode was removed. We had enough room between the top of the tank and the ceiling to remove the anode. However, if there was not sufficient space, the used rod will easily bend.

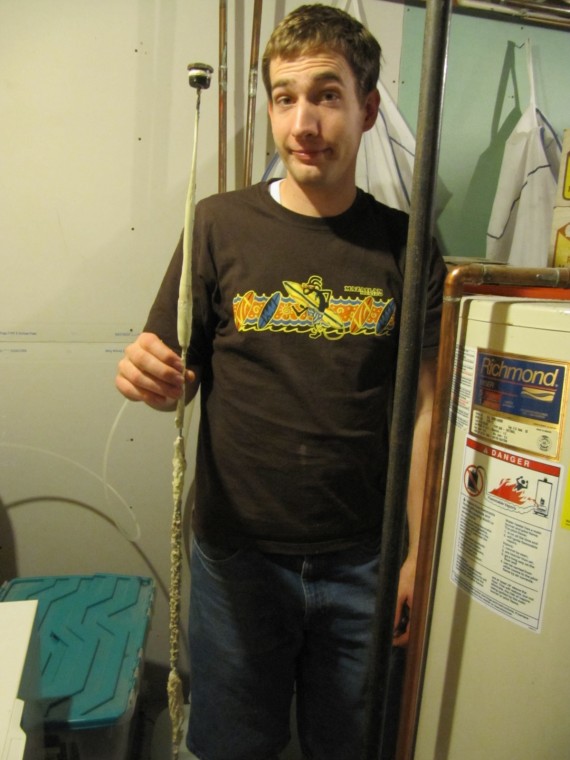
Inspecting the old anode

This is what our used anode looked like

On inspection, you can see that the anode does indeed need replacing. Four years ago this was a .84 inch thick 4 foot long solid magnesium hex-head anode.

Installation

Installing the new sacrificial anode is simple enough.

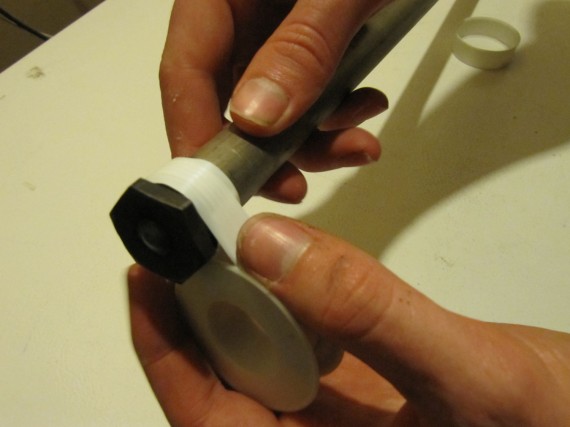
Adding tape for easy removal

Adding tape for easy removal

The new rod came with a roll of tape that is wound around the anode to make removal easier. The tape does not seem to hinder the essential electrolytic process that consumes the rod and thus protecting your tank.

Installing the anode

Installing the anode

Tightening the anode

Tightening the anode. Don't overdo it!

Anode fully installed

Anode fully installed. Paul, you do good work

Clean Up

Paul closed the temperature relief valve and turned the water back on.

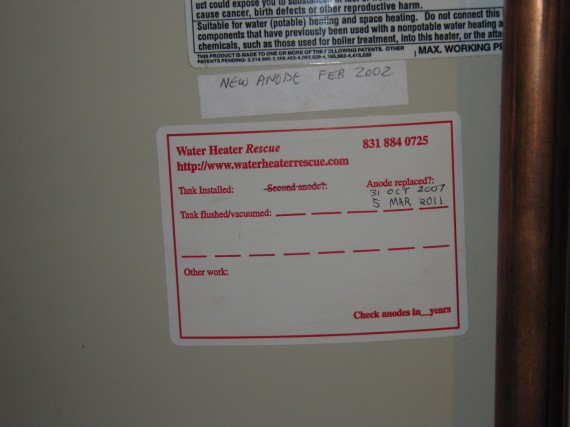
Recording the installation

Recording the installation date

It is very important to record the installation date. My previous kit came with a sticker to place on my tank. The first replacement was done five years after installation of the water heater, in February of 2002. The next replacement was 31 Oct 2007 and the latest was done less than five years later 5 March 2011. I also made an entry in Google Calendar which I set up to email me in four years to remind me to change the anode.

Notice that the sticker has a “Tank flushed/vacuumed” reminder. Flushing your tank will also prolong its life. I have flushed my tank once and it is overdue for another flush. However, that is a post for another day.

One final reminder. By replacing the anode you can substantially increase the life of your water heater. Spending $45 every five years will defer for some time the price of a new heater (around $500), plus the cost of installation if you pay someone to do it. Not to mention the inconvenience of suddenly being without hot water or cleaning up a leaking tank.

Out of curiosity, how many readers already knew about replacing the anode?
Videos

Poster Image

.

Poster Image

.
Rickety signature

Filed Under: How To, Rickety Picks Tagged With: Heater, Natural gas

Arduino AVR High-Voltage Serial Programmer

March 19, 2010 by paul w 115 Comments

My son Paul is the author of this guest post.

This Arduino sketch is useful for rescuing ATtiny microcontrollers rendered useless by incorrect fuse settings. It does this by putting the bricked tiny into high-voltage serial programming mode and writing the fuses to safe values.

Connection Diagram

Diagram

Click to enlarge

The Arduino is connected to the tiny though 1k resistors and a 2N3904 transistor is used to switch 12 volts applied to the tiny’s reset pin. After uploading the sketch the Arduino sends “Enter a character to continue.” repeatedly until communications are established by sending a byte through the serial monitor. The Arduino then programs the fuses.

Serial Monitor log

Enter a character to continue.

Enter a character to continue.

Enter a character to continue.

1

Entering programming Mode

lfuse reads as 62

hfuse reads as 5F

efuse reads as FF

Writing hfuse

Writing lfuse

lfuse reads as 62

hfuse reads as DF

efuse reads as FF

Exiting programming Mode

Download the program: hv_serial_prog.pde

Based on work by Jeff Keyzer.

Let me know if it works for you.

Filed Under: How To Tagged With: ATtiny, Bricked

Build an Arc Welder from Microwave Ovens: Part 4

October 31, 2009 by rickety 2 Comments

The Story So Far

Paul obtained his microwave ovens, wired the garage for 220 volts, extracted the first transformer, and rewinded the secondary. In this segment all he will be doing is to practice with a real arc-welder.

Paul practicing his arc-welding

Paul practicing his arc-welding

Paul decided before he used his homebrew arc-welder (not yet built) he would practice with a factory built arc-welder. He borrowed his grandfather’s arc-welder and tried it out today. He needed a suitable piece of scrap metal which he found in the middle of the road while driving home.

At a suitable distance I took several photographs. My son Steven tells me later that the arc light could damage the sensor in my camera. The welder has the old style 220 volt plug so Paul wasn’t able to use his new outlet in the garage. Our oven uses the older style 220 volt socket so Paul ran the welder from the kitchen.

Paul will be finished with his studies this December so maybe he will have time to finish his own arc-welder. In the meantime check out this video:

External Articles

Build a Microwave Transformer Homemade Stick/Arc Welder Learn from the experts.
Rickety signature.

Filed Under: How To Tagged With: Microwave Ovens, Transformers, Welders

Make a Halloween Costume from a Microwave Oven

October 24, 2009 by rickety 4 Comments

There is nothing quite like a happy microwave.

There is nothing quite like a happy microwave.

Paul is well known around Kaysville for his stockpile of microwave ovens. Not content with constructing an arc welder from microwaves Paul really started cooking when he needed a costume for Halloween.

Microwave Instructions

It was as simple as removing the innards to reduce weight, cutting a hole in the base of the microwave, bending back the metal, covering the edges with duct tape, and padding the interior with quilt batting. Stick two eyes and a mouth on the front to form a smiley face and you have one hot costume.

Notes

  • Do not slam the microwave door in Paul’s face.
  • Do not heat your hot chocolate while Paul is in the microwave.
  • Please do not play with the dials — they don’t work.
  • Don’t ask “Watts up?”.
  • Paul is not a “hothead”.
  • Paul maintains an open door policy.
  • Paul does not want to be plugged in.
  • If you leave food in the microwave, Paul will eat it.

Mama, I can't warm my pizza cos Paul is in the microwave!

Mama, I can't cook my pizza 'cause Paul is in the microwave!


Rickety signature.

Filed Under: How To Tagged With: Halloween

Build an Arc Welder from Microwave Ovens: Part 3

June 30, 2009 by rickety 6 Comments

The Story So Far

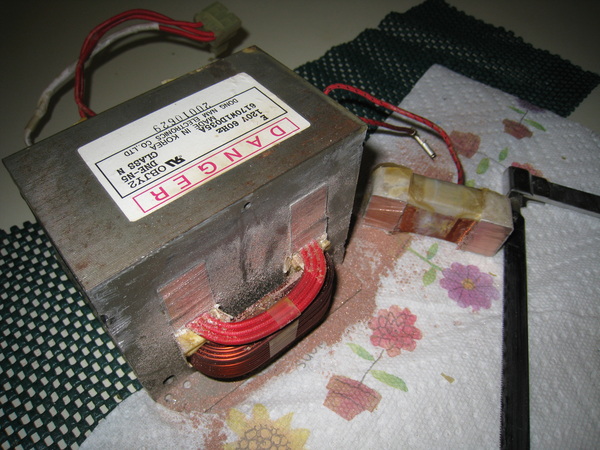
Paul obtained his microwave ovens, wired the garage for 220 volts, and extracted the first transformer. In this segment he replaces the old secondary windings with new, thicker wire.


Sawed off secondary.

One side of the secondary winding was sawed off with a hacksaw.

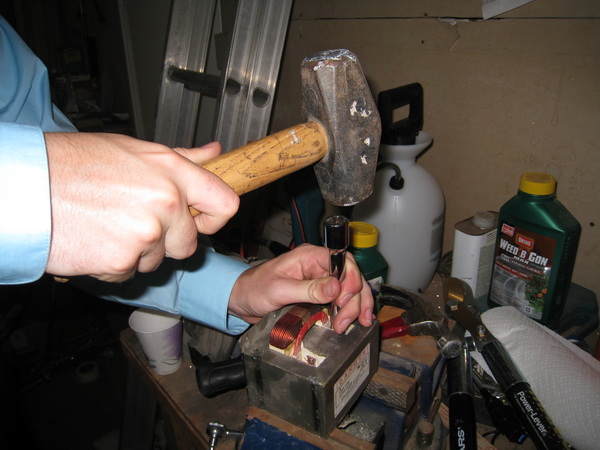
Bash out the secondary.

The secondary windings were in so tight they had to be knocked out.

Tear out the secondary.

Tearing out a few windings loosened the rest.

Secondary removed.

The secondary is completely removed.

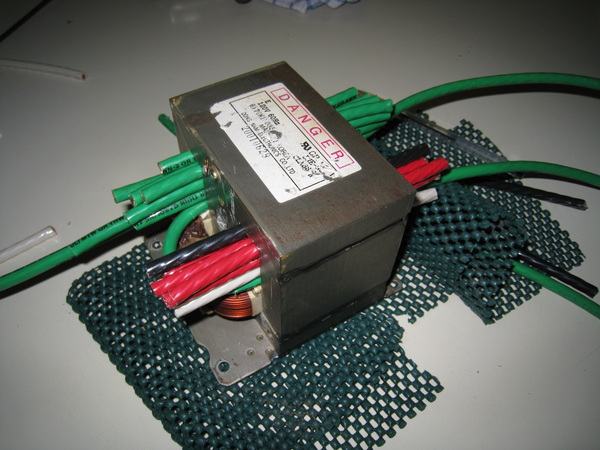
Wire guides.

Using short lengths of 6 gauge wire as guides.

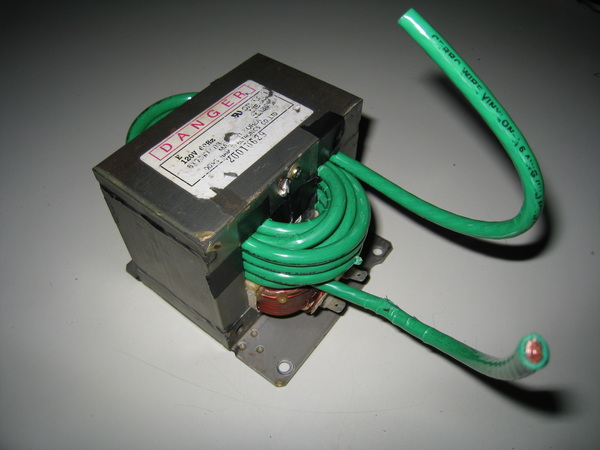
New secondary.

The completed secondary consists of 11 feet of 6 gauge wire wound in 11 turns.

Related Articles

Build a Microwave Transformer Homemade Stick/Arc Welder Learn from the experts.
Rickety signature.

Filed Under: How To Tagged With: Microwave Ovens, Transformers, Welders

Build an Arc Welder from Microwave Ovens: Part 2

June 26, 2009 by rickety 2 Comments


220 volts source for the arc welder

220 volts source for the arc welder

220 Volt Source

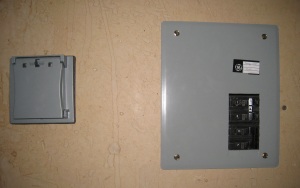
After acquiring more than the necessary microwave ovens Paul turned his attention to a source of 220 volts. My electric range is plugged into the wall that separates the kitchen from the garage. Paul simply placed a 125 amp main lug load center in the garage side of the wall and tapped into the 220 volt source. He then ran a line to a 220 volt wall socket he installed in the garage.

Transformers

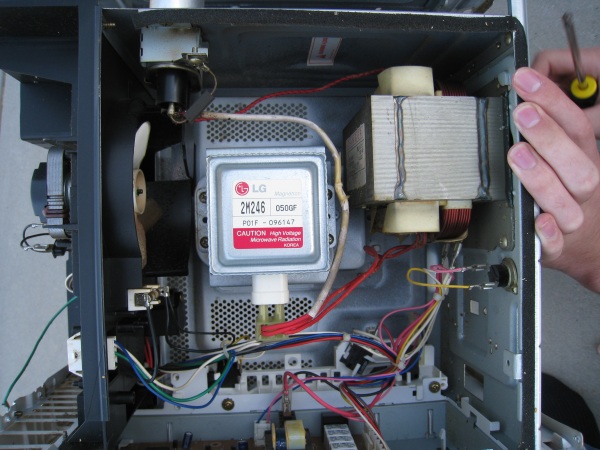
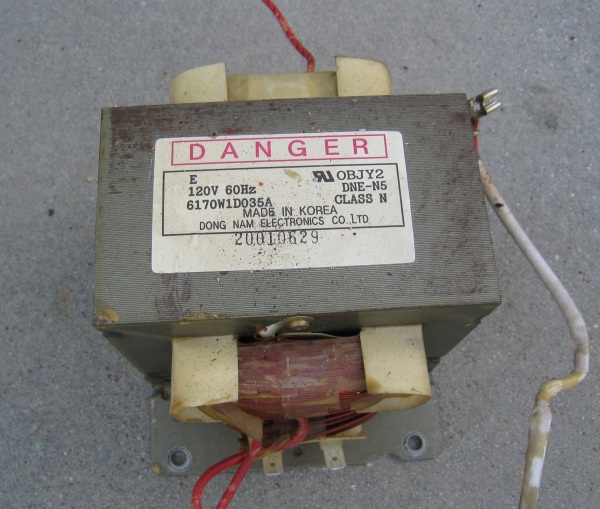
To power the arc welder Paul needs six transformers. At a cost of $5 for 33 microwaves, one transformer sets him back 15 cents. He dismantled his first microwave oven and extracted the transformer. Anyone need a used microwave oven? With school and work pressing in on him the rest of the transformers will have to wait.


The transformer on the right is all that is required

The transformer on the right is all that is required


The transformer on the right is all that is required

The 15 cent transformer

Related Articles

Build a Microwave Transformer Homemade Stick/Arc Welder Learn from the experts
Rickety signature

Filed Under: How To Tagged With: Microwave Ovens, Transformers, Welders

Build an Arc Welder from Microwave Ovens

June 17, 2009 by rickety 17 Comments


Paul with his microwave ovens

Paul with his 33 microwave ovens to turn into one or more arc welders

Microwave Ovens

I came home from work to be greeted by Paul, “Hey dad, do you want to see my latest project?” He showed me his purchase of 33 microwave ovens that he will turn into an arc welder. He said that he only needs two microwave oven transformers for the arc welder. Some designs use eight, and besides, “I can always make more than one.” Great, Paul with an arc welder in each hand!

$5 A Pallet

Paul said that he got the microwaves from Tech Cycle that advertised the microwave ovens on Craigslist for $5 a pallet. Here is what the ad said:

Tech Cycle
801-886-6050
1499 So 700 W
Salt Lake City, UT 84104
.
Here is a deal of a lifetime. If you need a microwave, now is the time to buy. We are a business trying to make some room in are [sic] warehouse. We have a pallet of microwaves for 5.00 but here is the catch. YOU MUST TAKE THE WHOLE PALLET. If interested call me or come by.

It appears that Tech Cycle may be connected with Executive Recycling who don’t seem too particular where their electronic waste ends up. The Salt Lake address (1499 S. 700 W.) on their former website is the same as Tech Cycle’s. Some of the microwaves came from Deseret Industries. Anyway, Paul is going to recycle these microwaves into welders. He’s really cookin’ now so standby for updates.

External Articles

Build a Microwave Transformer Homemade Stick/Arc Welder Learn from the experts.
Rickety signature

Filed Under: How To Tagged With: Microwave Ovens, Welders

Installing a PermaStone Modular Vinyl Tile Floor

May 24, 2009 by rickety 10 Comments

We needed new carpet and linoleum on the ground floor of our home. In April we called in Henry’s of Bountiful to do the work. This post is not meant as a tutorial on how to install PermaStone vinyl tile. It will however show you how the installation progressed, what it cost, and how well the finished product looks.

Click on the photographs below to see enlarged versions.

Moving Out

Except for the front room, everything on the ground floor was moved into the garage. The green stuff on the right is what is left of the old carpet underlay. Installing the carpet and vinyl was going to take two days.

Fishing Trip

Even the fish had to move. This bucket was their temporary home for a few days. One of the fish jumped out on to the floor but Jake scooped him back up. I bet he felt like a fish out of water. We put a book over the top of the bucket to prevent any more escapes.

Midnight Snacks

Not long ago the front room had been carpeted so it was useful for storing items that were too big or heavy to move to the garage.

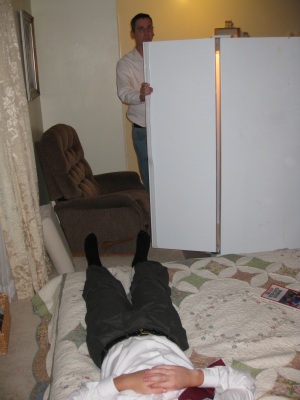
Our king size bed was too large to get into the basement so we threw the mattress down in the front room. We borrowed a neighbor’s dolly to move the refrigerator. The plan was to put it in the garage. The dolly wasn’t strong enough to take the refrigerator down the steps so we stored it in the front room. This turned out to be very handy. During the night when I wanted a snack, the refrigerator was right by my bedside. It was surprisingly quiet and didn’t disturb our sleep.

That is my son Paul laying on the bed.

Out With The Old

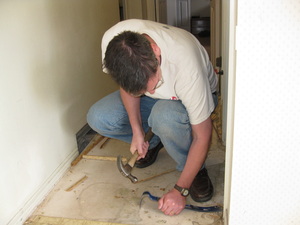
We tore out the old carpet and underlay. The linoleum stayed and the vinyl tiles will be installed on top. The hallway carpet was to be replaced with the tile. Here I am pulling up the old carpet fastening strips. I left the carpet strips in place in the bedrooms. The kitchen linoleum was scrubbed with bleach to remove any grease.

In With The New

This pile of boxes contains part of the new floor. At the Nafco website you can see the three sizes of tile that are in the box. The flooring has a natural texture and subtle coloration. The tiles come in three different sizes that fit seamlessly into stylish modular units. Each modular unit is comprised of two 16″x16″, three 8″x8″, and two 8″x16″ tiles.

Stick To It

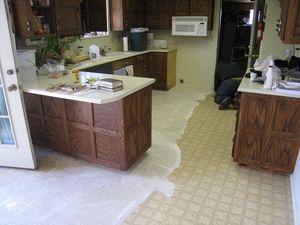
The kitchen and dining area were the first to get a coat of adhesive. That’s the white stuff on the floor.

The installers had difficulty finding my home so had a late start. Nevertheless they finished the vinyl and started on the carpet. They stuck to the job until 8pm but couldn’t quite get finished. They completed the installation the next day.

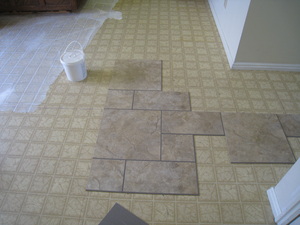
A Pattern Emerges

Once the first tiles were laid the rest of the tiles were installed very quickly. This is perhaps a job I could do myself but the first time around I was content to watch how it was done. These two men worked hard all day and into the evening.

Henry’s

Here the installer is building upon the first few tiles that were laid in the center of the floor.

Henry’s was recommended to us by a friend. Here is Henry’s Floor Coverings blog. Henry Smith started the company in 1953 and it is now owned by his grandson, Nick Berry. Nick is the one who helped us select PermaStone for our floor.

A Module Unit Emerges

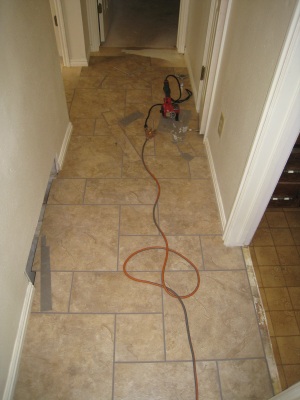
Do you recall the module units mentioned in In With The New? Here you can see the units emerging made up of two large squares, two rectangles, and three small squares. Then they repeat. You can clearly see two full modular units that are not covered by equipment.

Entranceway Under Construction

Here the carpet had to be lifted to install the tile. There was also a small area where the floor had settled. This was no problem for vinyl tile because of its flexibility. If I had chosen ceramic tile I may have had to level out the floor.

An interesting feature of these tiles is GroutFit that is only on two sides of the tile. When they are fitted together, you see a seamless floor. According to Erica Hubbard, the director of marketing for Nafco by Tarkett, “the grout feels amazingly real” without the headaches of real grout.

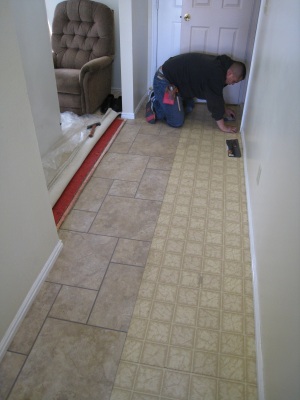
Hallway Under Construction

This is the hallway that originally was carpeted. Now it is tiled all the way to the three bedrooms. This is a better solution to reduce wear and tear that was very visible on our old carpet. On the subject of tears, consider how easy it is to replace a tile:

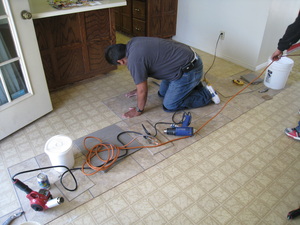
It is inevitable that a tile is going to be damaged during the lifetime of the floor. Perhaps it happens while redecorating, or moving furniture from room to room. Replacement takes just a few minutes. Using a heat gun and a utility knife, remove the damaged tile. Then apply adhesive to a new tile and replace it.

For this purpose I purchased an extra box of tiles to use as replacements.

PermaStone Closeup

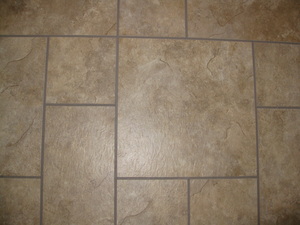
This photograph shows the “grouting” in more detail. It looks like the real thing. Click on the photograph to get an enlarged view.

The pattern we chose is called Natural Slate (PMR-660) with the Dune color. There are other colors in the slate, namely Flint and River Rock. Of course there are several other patterns and colors to choose from.

Cornered

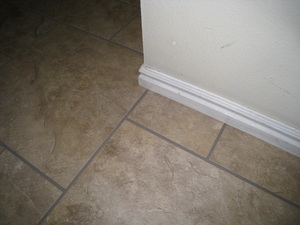
The corners had a great fit as you can see here. We retained the original baseboards. The tiles were fitted right up to them and a small amount of grout (real this time) finished the job. Perhaps it isn’t grout but something similar. Anyway the results are perfect.

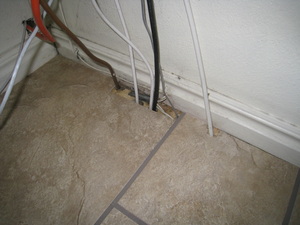
Cut Around The Wires

The space behind my refrigerator is where I feed wires from the attic through to the basement. The installers neatly went around the wires. This part is always hidden from view once the refrigerator is returned.

Coving

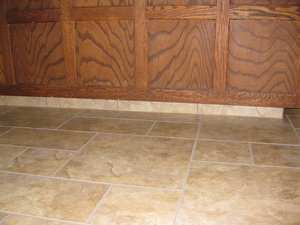
The kitchen had 36 feet of coving that needed to be replaced. This was achieved by using the tile itself. I like how it came out. For the coving there was an additional $99 charge for labor which was in the original quote. I tore out the existing coving but it was not very difficult. Tearing things out is so much easier than putting stuff in!

Finished Entranceway

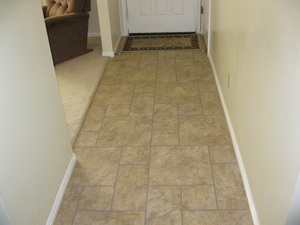
All done. It looks just like brand new. The carpet is back in place and the refrigerator has been moved back into the kitchen. No more midnight snacks without getting out of bed. You can see the modular units in the flooring except this time they are vertically oriented.

Finished Dining Area

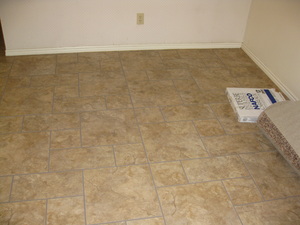
There is my spare box of tiles that I hope I never have to use. This dining area looks clean enough to eat off. However, we did bring the dining table back in to the house. By the tile box is a roll of our new carpet that was installed.

Finished Kitchen

Now that is a fine looking kitchen floor. After 26 years the linoleum was finally replaced. And about time Jill said. So my wife is happy, so I’m happy, Henry’s is happy (they got paid) — even the fish are happy. It’s enough to make you want to smile.

Cost

I am always asked in the comments, “How much did it cost you?” So here goes:

$1,520.00 — PermaStone Vinyl Tile PMR-660 Dune (380 square feet @ $4.00)
…$718.20 — Labor (380 square feet @ $1.89)
…..$99.00 — Extra Labor Charge, Vinyl Coving (36 feet @ $2.74)
—————–
$2,337.20

Versions prior to Internet Explorer 8 do not render the borders correctly. Try using FireFox.
Rickety signature

Filed Under: How To, Rickety Picks Tagged With: Floor, PermaStone, Tile, Vinyl

  • 1
  • 2
  • Next Page »

Recent Comments

  • Anonymous on One Hundred Thousand Milpengo
  • Jeremy McMullin on Mesa Easter Pageant – Jesus The Christ
  • Genma Vincent on George W Bush on Religion
  • Anonymous on The Twelve Stones of The Apocalypse
  • Judy Crowe on Ten Artists Paint Old Testament Women
  • Angela on The Twelve Stones of The Apocalypse
  • Angela on The Twelve Stones of The Apocalypse
  • AllHailKingJesus on The Twelve Stones of The Apocalypse
  • Microwave guy on Make a Halloween Costume from a Microwave Oven
  • Anonymous on Arduino AVR High-Voltage Serial Programmer

Who is this Rickety?

Rick at homeI'm Rick Willoughby. I live in Utah, a retired Software Engineer. I'm a Mormon, married with 5 children and 12 grandchildren.

I emigrated from England in my late twenties, bringing with me one small suitcase and a few dollars. I appreciate the opportunities America has given me and the friendliness of the people to new citizens.

I blog about my family as well as politics, religion, finance, technology, and other topics.

Copyright © 2025 · Lifestyle Pro Theme on Genesis Framework · WordPress · Log in